Setup k8s cluster - practice
Setup VM
Environment (ubuntu >= 16.04 recommended):
| IP | Type | System |
|---|---|---|
| 10.xxx.xxx.215 | Master | Ubuntu 16.04 |
| 10.xxx.xxx.214 | Slave | Ubuntu 16.04 |
| 10.xxx.xxx.219 | Slave | Ubuntu 16.04 |
Note: pay close attention to the hostname of each VM/BM, the same hostname would cause issue while calling kubectl get nodes as below.
https://github.com/kubernetes-incubator/kubespray/issues/1515
In my setup, Since I had all the vm's cloned to create multiple hosts for k8s cluster, all my vm's had the same hostname in "/etc/hosts" and hence, "kubectl get nodes" was showing all of the nodes as one single entry, after changing each nodes with a different hostname in "/etc/hosts" individually and reinstalling k8s using kubespay, It worked fine for me :-)
Install docker
Note: both on masters and slaves
https://docs.docker.com/install/linux/docker-ce/ubuntu/
Initialize cluster
Install k8s services, both on masters and slaves
- add GPG key
$ curl https://packages.cloud.google.com/apt/doc/apt-key.gpg --insecure | sudo apt-key add -
- add debian source
creating the file /etc/apt/sources.list.d/kubernetes.list:
$ vim /etc/apt/sources.list.d/kubernetes.list

and enter the following content:
deb http://apt.kubernetes.io/ kubernetes-xenial main
- add Google CA , otherwise, you can't successfully apt-get update from k8s debian repo
$ sudo su
$ echo -n | openssl s_client -showcerts -connect storage.googleapis.com:443 2>/dev/null | sed -ne '/-BEGIN CERTIFICATE-/,/-END CERTIFICATE-/p' > /usr/local/share/ca-certificates/googleapis.crt
$ update-ca-certificates
- Restart docker engine
$ sudo service docker restart
- Install k8s tools (components)
$ apt-get update
$ apt-get install -y kubelet kubeadm kubectl kubernetes-cni
- Disable swap (kubelet does not support swap memory and will not work if swap is active)
$ sudo swapoff -a
- Check kubelet status
$ sudo systemctl status kubelet.service
Initialize master
- Initialize:
$ sudo kubeadm init --pod-network-cidr=10.244.0.0/16 --apiserver-advertise-address $YOUR_VM_IP
Your Kubernetes master has initialized successfully!
To start using your cluster, you need to run the following as a regular user:
mkdir -p $HOME/.kube
sudo cp -i /etc/kubernetes/admin.conf $HOME/.kube/config
sudo chown $(id -u):$(id -g) $HOME/.kube/config
You should now deploy a pod network to the cluster.
Run "kubectl apply -f [podnetwork].yaml" with one of the options listed at:

https://kubernetes.io/docs/concepts/cluster-administration/addons/

You can now join any number of machines by running the following on each node
as root:
kubeadm join 10.xx.xx.215:6443 --token 35p4qs.fw5px8apre4ynyjx --discovery-token-ca-cert-hash sha256:900a0f1fef61a33e395a12f8aedbc98ee2475ecf0ddc9dd36fe6d8432c8e31ec
- Copy configuration file
$ mkdir -p $HOME/.kube
$ cp -i /etc/kubernetes/admin.conf $HOME/.kube/config
$ chown $(id -u):$(id -g) $HOME/.kube/config
- Deploy K8S Internal Network
$ kubectl apply -f https://raw.githubusercontent.com/coreos/flannel/master/Documentation/kube-flannel.yml
$ kubectl apply -f https://raw.githubusercontent.com/coreos/flannel/master/Documentation/k8s-manifests/kube-flannel-rbac.yml
- Get master token
$ sudo kubeadm token list
- Get master CA Hash
$ openssl x509 -pubkey -in /etc/kubernetes/pki/ca.crt | openssl rsa -pubin -outform der 2>/dev/null | openssl dgst -sha256 -hex | sed 's/^.* //'
Add slaves
$ kubeadm join --token $TOKEN --discovery-token-ca-cert-hash sha256:$CA_HASH $MASTER_IP:6443
$ kubeadm join 10.xx.xx.215:6443 --token 35p4qs.fw5px8apre4ynyjx --discovery-token-ca-cert-hash sha256:900a0f1fef61a33e395a12f8aedbc98ee2475ecf0ddc9dd36fe6d8432c8e31ec
Check nodes
$ kubectl get nodes
Kubernetes Dashboard
On master node
a. Download dashboard deployment configuration YAML
$ wget https://raw.githubusercontent.com/kubernetes/dashboard/master/src/deploy/recommended/kubernetes-dashboard.yaml
b. Modify the yaml , to add your IP as below (otherwise, you will need kubectl proxy or other way to access the dashboard remotely...)
kind: Service
apiVersion: v1
metadata:
  labels:
    k8s-app: kubernetes-dashboard
  name: kubernetes-dashboard
  namespace: kube-system
spec:
  externalIPs:             ## newly added
    - 10.**.**.218         ## newly added your master public accessible IP
  ports:
    - port: 443
      targetPort: 8443
  selector:
    k8s-app: kubernetes-dashboard
c. Install dashboard
$ kubectl create -f kubernetes-dashboard.yaml
d. Visit dashboard UI (Chrome may reject due to certification issue. Firefox will be a quick workaround)
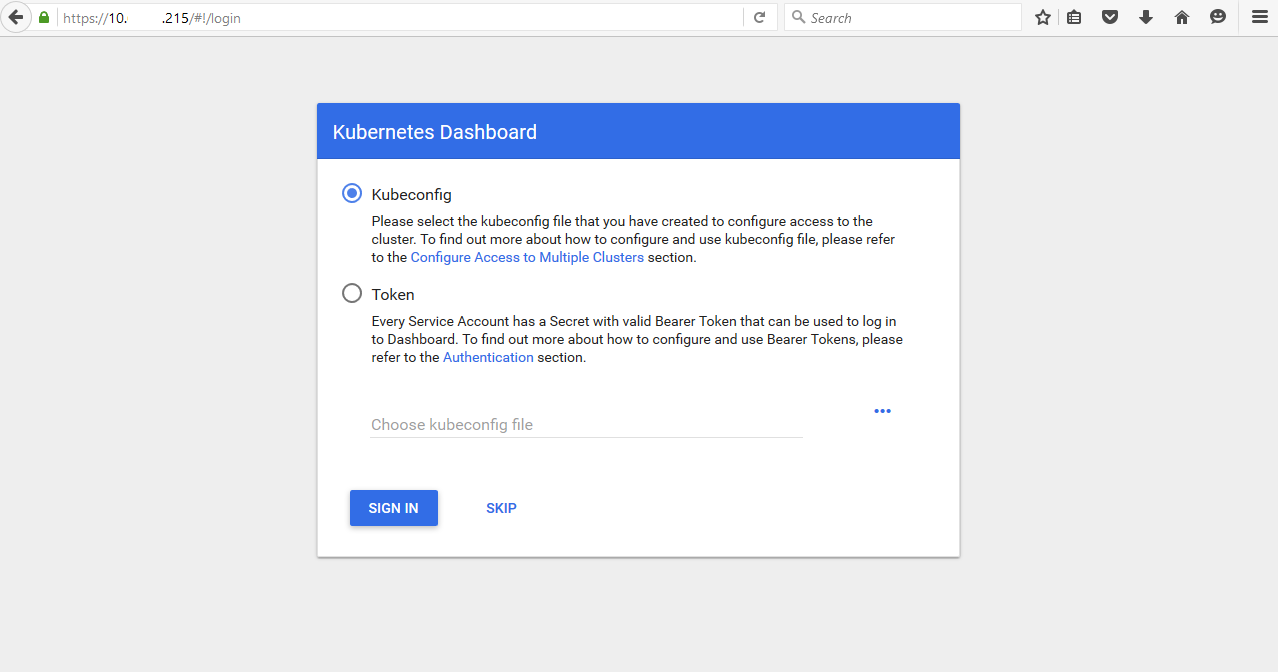
e. Login "Token" on webpage with that, But you are not able to see anything without privilege. That's due to above default user doesn't have enough privilege.
Create an "admin" role
$ kubectl create -f https://raw.githubusercontent.com/rootsongjc/kubernetes-handbook/master/manifests/dashboard-1.7.1/admin-role.yaml
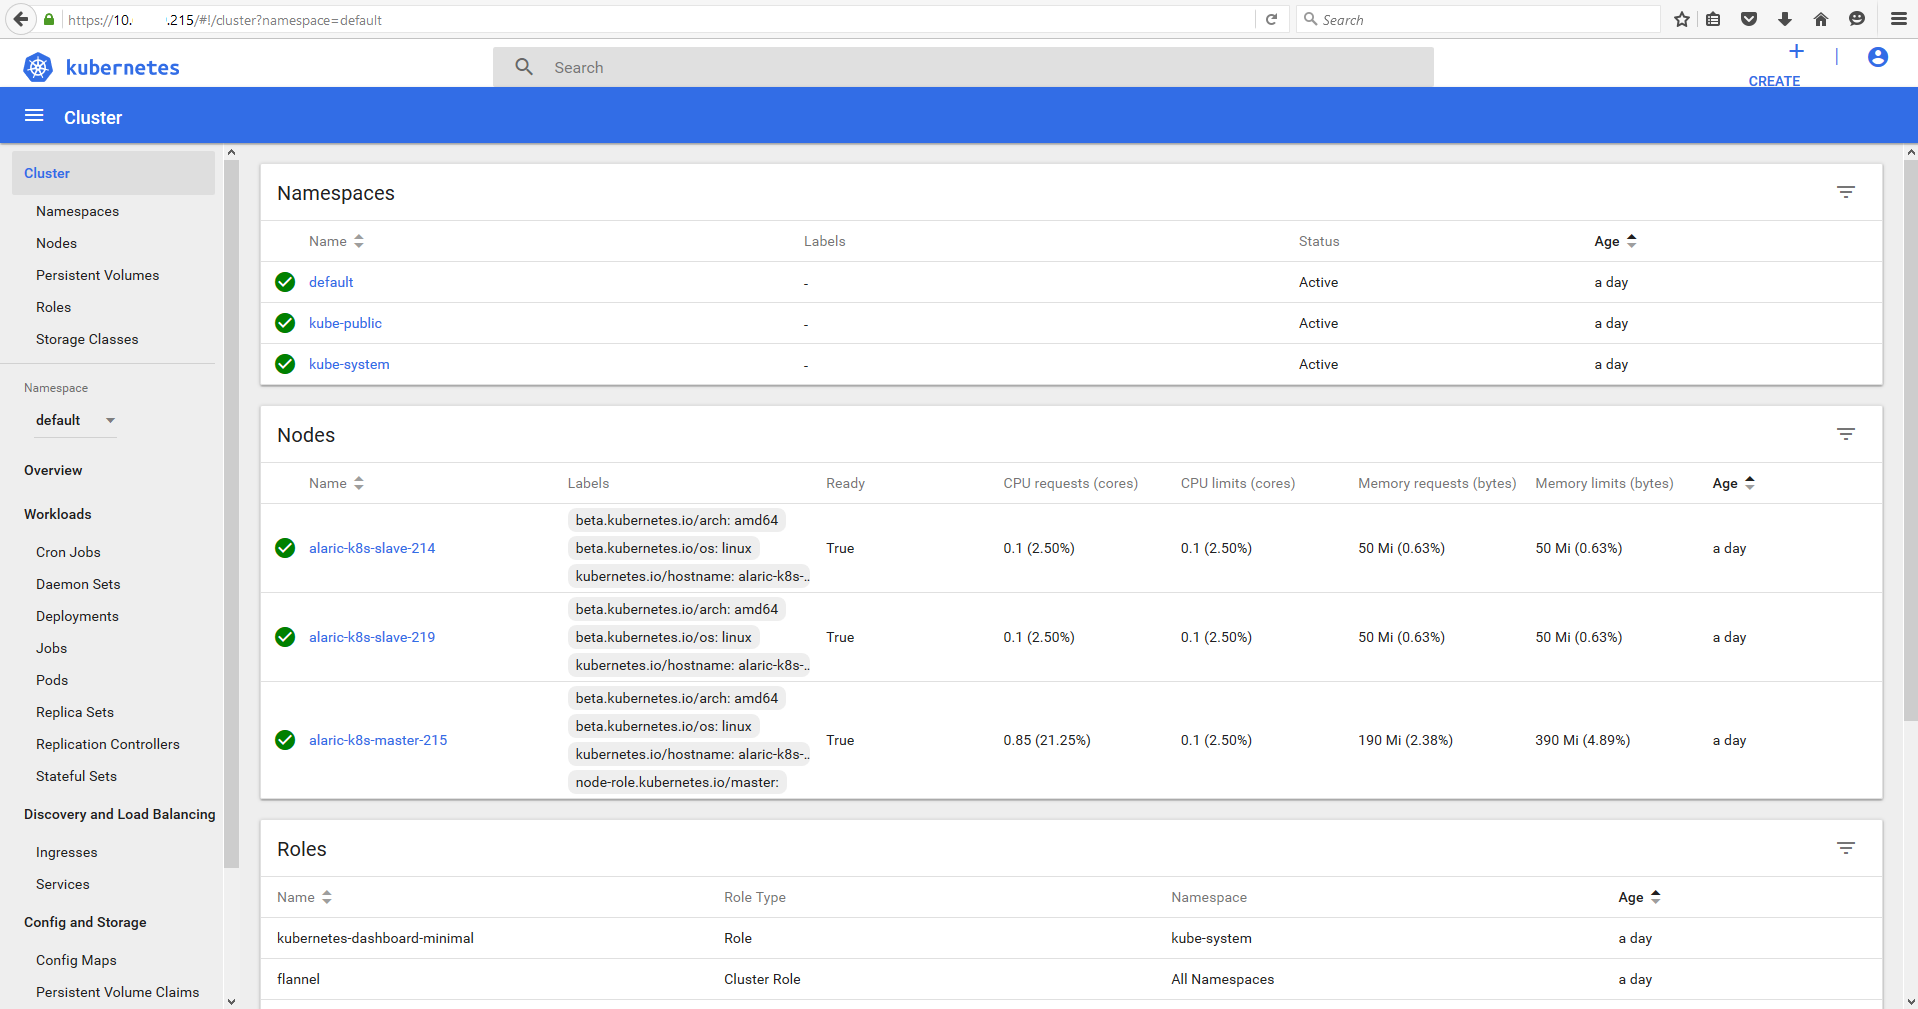
f. Obtain admin token, Login webpage with this token, and you are all set
$ kubectl -n kube-system describe secret \`kubectl -n kube-system get secret\|grep admin-token\|cut -d " " -f1\`\|grep "token:"\|tr -s " "\|cut -d " " -f2
g. Login with admin token
h. Update dashboard/configuration
$ kubectl -n kube-system delete service kubernetes-dashboard
$ kubectl -n kube-system delete $(kubectl -n kube-system get pod -o name | grep dashboard)
$ kubectl apply -f kubernetes-dashboard.yaml
i. Recommended setup and access
Secure HTTPS connection with public trusted Certificate Authorities.

Access types:
    ○ Kubectl proxy (http)
    ○ NodePort (AIO/single node)
    ○ API Server
    ○ ExternalIP
    ○ Loadbalancer
Nginx Deployment (NodePort)
a. Create Nginx deployment
$ kubectl create deployment nginx --image=nginx
b. Check deployment
$ kubectl get deployments | grep nginx
c. View details description of nginx deployment
$ kubectl describe deployment nginx
d. Expose it by service in NodePort type
$ kubectl create service nodeport nginx --tcp=80:80
e. Visit nginx homepage to verify the deployment
$ curl 10.xx.xx.214:32523

Deployment echoserver
$ kubectl run echoserver --replicas=2 --image=gcr.io/google_containers/echoserver:1.4 --port=8080
The preceding command creates a Deployment object and an associated ReplicaSet object. The ReplicaSet has two Pods, each of which runs the echoserver application.
Display Pods
$ kubectl get pods [| grep echoserver]

Create a Service object that exposes the deployment
$ kubectl expose deployment echoserver --type=NodePort [--name=echoserver]
Display information about the Service
$ kubectl get services [echoserver]

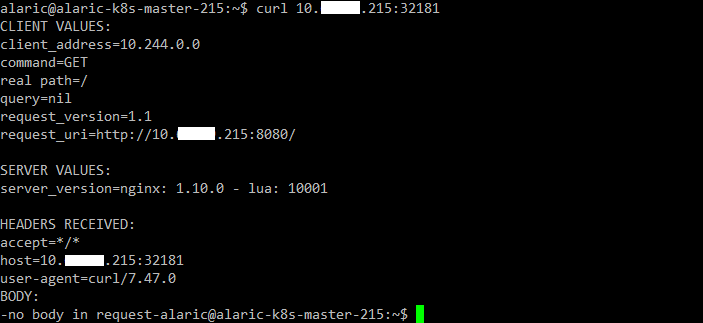
Access to echoserver
$ curl 10.xx.xx.214:32181
Troubleshooting with kubectl
The most common operations can be done with the following kubectl commands
kubectl get - list resources
kubectl describe - show detailed information about a resource
kubectl logs - print the logs from a container in a pod
kubectl exec - execute a command on a container in a pod
View command help
$ kubectl exec -h

List the environment variables
$ kubectl exec $POD_NAME env

Start a bash session in the Pod's container
$ kubectl exec -it $POD_NAME bash
Service Types
Kubernetes supports different types of services for different use cases.
ClusterIP (default)
A ClusterIP service makes it accessible from any of the Kubernetes cluster’s nodes. The use of virtual IP addresses for this purpose makes it possible to have several pods expose the same port on the same node – All of these pods will be accessible via a unique IP address.
NodePort
For a NodePort service, Kubernetes allocates a port from a configured range (default is 30000-32767), and each node forwards that port, which is the same on each node, to the service. It is possible to define a specific port number, but you should take care to avoid potential port conflicts.
LoadBalancer
For a LoadBalancer service, Kubernetes provisions an external load balancer. The type of service depends on how the specific Kubernetes cluster is configured.
ExternalIP
An ExternalIP service uses an IP address from the predefined pool of external IP addresses routed to the cluster’s nodes. These external IP addresses are not managed by Kubernetes; they are the responsibility of the cluster administrator.
Services without selector
It is also possible to create and use services without selectors. A user can manually map the service to specific endpoints, and the service works as if it had a selector. The traffic is routed to endpoints defined by the user.
ExternalName
ExternalName is a special case of service that does not have selectors. It does not define any ports or endpoints. Instead, it returns the name of an external service that resides outside the cluster. Such a service works in the same way as others, with the only difference being that the redirection happens at the DNS level without proxying or forwarding. Later, you may decide to replace an external service with an internal one. In this case, you will need to replace a service definition in your application.
Deploying PHP Guestbook application with Redis
The guestbook application uses Redis to store its data. It writes its data to a Redis master instance and reads data from multiple Redis slave instances.
Create Redis Master Deployment
a. Download and apply Redis Master Deployment manifest file
$ wget https://raw.githubusercontent.com/kubernetes/website/master/content/en/examples/application/guestbook/redis-master-deployment.yaml
$ kubectl apply -f redis-master-deployment.yaml

Or
$ kubectl apply -f https://k8s.io/examples/application/guestbook/redis-master-deployment.yaml
b. List Pods to verify Redis Master Pod is running
$ kubectl get pods | grep redis
c. Run the following command to view the logs from the Redis Master Pod
$ kubectl logs -f Pod-name

Create Redis Master Service
The guestbook applications needs to communicate to the Redis master to write its data. Apply a Service to proxy the traffic to the Redis master Pod. This manifest file creates a Service named redis-master with a set of labels that match the labels previously defined, so the Service routes network traffic to the Redis master Pod.
a. Create Redis Master Service
Download and apply Redis Master Service manifest YAML
$ wget https://raw.githubusercontent.com/kubernetes/website/master/content/en/examples/application/guestbook/redis-master-service.yaml
$ kubectl apply -f redis-master-service.yaml

Or
$ kubectl apply -f kubectl apply -f https://k8s.io/examples/application/guestbook/redis-master-service.yaml
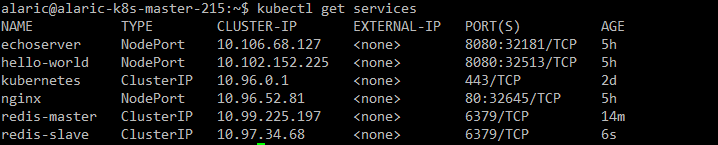
b. Check service
$ kubectl get services
Create Redis Slave Deployment
a. Apply Redis Slave Deployment (Replicas=2)
$ wget https://raw.githubusercontent.com/kubernetes/website/master/content/en/examples/application/guestbook/redis-slave-deployment.yaml
$ kubectl apply -f redis-slave-deployment.yaml

Or
$ kubectl apply -f https://k8s.io/examples/application/guestbook/redis-slave-deployment.yaml
b. Check Pods status
$ kubectl get pods
Create Redis Slave Service
The guestbook application needs to communicate to Redis slaves to read data. To make the Redis slaves discoverable, we need to set up a Service.
a. Apply Redis Slave Service
$ wget https://raw.githubusercontent.com/kubernetes/website/master/content/en/examples/application/guestbook/redis-slave-service.yaml
$ kubectl apply -f redis-slave-service.yaml

Or
$ kubectl apply -f https://k8s.io/examples/application/guestbook/redis-slave-service.yaml
b. Verify service is running
$ kubectl get services
Set up and Expose the Guestbook Frontend
The guestbook application has a web frontend serving the HTTP requests written in PHP. It is configured to connect to the redis-master Service for write requests and the redis-slave service for Read requests.
Create Guestbook Frontend Deployment
a. Apply Guestbook Frontend deployment YAML
$ wget https://raw.githubusercontent.com/kubernetes/website/master/content/en/examples/application/guestbook/frontend-deployment.yaml
$ kubectl apply -f frontend-deployment.yaml

Or
$ kubectl apply -f https://k8s.io/examples/application/guestbook/frontend-deployment.yaml
b. Verify deployment
$ kubectl get pods -l app=guestbook -l tier=frontend
Create Frontend Service
The redis-slave and redis-master Services you applied are only accessible within the container cluster because the default type for a Service is ClusterIP. ClusterIP provides a single IP address for the set of Pods the Service is pointing to. This IP address is accessible only within the cluster.
Note: here we use service in NodePort type, some cloud providers, like Google Compute Engine or Google Kubernetes Engine, support external load balancers. If your cloud provider supports load balancers and you want to use it, simply delete or comment out type: NodePort, and uncomment type: LoadBalancer.
a. Apply Frontend Service YAML
$ wget https://raw.githubusercontent.com/kubernetes/website/master/content/en/examples/application/guestbook/frontend-service.yaml
$ kubectl apply -f frontend-service.yaml

Or
$ kubectl apply -f https://k8s.io/examples/application/guestbook/frontend-service.yaml
b. Verify service
$ kubectl get services -l tier=frontend

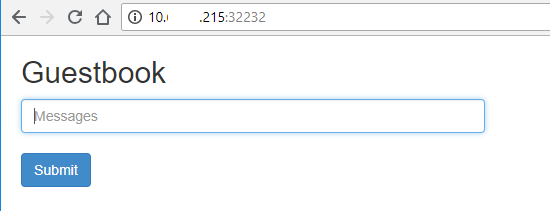
c. Visit Frontend service via NodePort
$ curl http://10.xx.xx.214:32232

Or visit in web brower
http://10.xx.xx.214:32232
Clean up Redis Deployment and Services
$ kubectl delete deployment -l app=redis
$ kubectl delete service -l app=redis
$ kubectl delete deployment -l app=guestbook
$ kubectl delete service -l app=guestbook
Reference
https://kubernetes.io/docs/tutorials
https://github.com/kubernetes/dashboard/wiki/Access-control
https://github.com/kubernetes/dashboard/wiki/Installation#recommended-setup
https://kubernetes.io/docs/concepts/services-networking/service/
https://github.com/panpan0000/KubernetesNotes/blob/master/K8SClusterOnUbuntu.md